In this tutorial I will show you what is necessary to publish your artifacts to Maven Central
Setup your Group ID
For deploying to Maven Central, you need a Group ID that identifies your projects. To get one, you first need to create a Jira account at issues.sonatype.org and login to your new account.
Now create a new issue for registering the Group ID. The Group ID is the reverse notification of domain name that all your projects will belong to. You can use your project for as many projects as you want and all Group IDs derived from the registered one will also be valid for the Maven Central repo. After submitting the Issue you will need to prove your domain ownership by setting a TXT record for your domain, containing the ID of the issue you have submitted.
When the registration process is finished, you will be notified by email.
Setup your pom.xml
Specify your Group ID, Artifact ID, version number and the packaging
    <groupId>de.osshangar</groupId>
    <artifactId>java-plugin-framework</artifactId>
    <version>1.0</version>
    <packaging>jar</packaging>
Add some required meta information about your artifact. Sonatype requires you to provide the name and description of the project, the URL of the projects homepage, the license which apply to the artifact and the developers that participate in the project:
    <name>Java Plugin Framework</name>
    <description>Library for adding plugin support to your java application.</description>
    <url>https://gitlab.com/marvinh/plugin-system-for-java</url>

    <licenses>
        <license>
            <name>MIT License</name>
            <url>https://opensource.org/licenses/MIT</url>
            <distribution>repo</distribution>
        </license>
    </licenses>
    <developers>
        <developer>
            <id>MH</id>
            <name>Marvin Haagen</name>
            <email>dev@osshangar.de</email>
            <roles>
                <role>architect</role>
                <role>developer</role>
            </roles>
            <timezone>Europe/Berlin</timezone>
        </developer>
</developers>Sonatype also requires you to specify the URL to the version control system of the project:
    <scm>
        <url>https://gitlab.com/oss-hangar-libraries/java-plugin-framework</url>
    </scm>
Specify the source version and the target version of your artifact:
    <properties>
        <maven.compiler.source>8</maven.compiler.source>
        <maven.compiler.target>8</maven.compiler.target>
        <project.build.sourceEncoding>UTF-8</project.build.sourceEncoding>
</properties>If you specify 8 or 1.8 as the target version, you will need a Java 8 or later runtime to run the code.
You also need to specify the DistributionManagement in your pom:
    <distributionManagement>
        <snapshotRepository>
            <id>central</id>
            <url>https://s01.oss.sonatype.org/content/repositories/snapshots</url>
        </snapshotRepository>
        <repository>
            <id>ossrh</id>
            <url>https://s01.oss.sonatype.org/service/local/staging/deploy/maven2/</url>
        </repository>
    </distributionManagement>
Add the Nexus Staging Maven Plugin. In the deploy phase it will deploy the built artifact to Sonatype:
    <build>
        <plugins>
            <plugin>
                <groupId>org.sonatype.plugins</groupId>
                <artifactId>nexus-staging-maven-plugin</artifactId>
                <version>1.6.12</version>
                <extensions>true</extensions>
                <executions>
                    <execution>
                        <id>default-deploy</id>
                        <phase>deploy</phase>
                        <goals>
                            <goal>deploy</goal>
                        </goals>
                    </execution>
                </executions>
                <configuration>
                    <serverId>ossrh</serverId>
                    <nexusUrl>https://s01.oss.sonatype.org/</nexusUrl>
                    <autoReleaseAfterClose>true</autoReleaseAfterClose>
                </configuration>
            </plugin>
        </plugins>
</build>Sonatype requires you to have the source code and the javadoc attached to the artifact as separate JAR files. This is done by the Maven Javadoc Plugin and the Maven Source Plugin, which you need to specify within the build plugins section of your pom.xml:
            <plugin>
                <groupId>org.apache.maven.plugins</groupId>
                <artifactId>maven-javadoc-plugin</artifactId>
                <version>3.3.2</version>
                <executions>
                    <execution>
                        <id>attach-javadocs</id>
                        <phase>package</phase>
                        <goals>
                            <goal>jar</goal>
                        </goals>
                    </execution>
                </executions>
            </plugin>
            <plugin>
                <groupId>org.apache.maven.plugins</groupId>
                <artifactId>maven-source-plugin</artifactId>
                <version>3.2.1</version>
                <executions>
                    <execution>
                        <id>attach-sources</id>
                        <phase>package</phase>
                        <goals>
                            <goal>jar-no-fork</goal>
                        </goals>
                    </execution>
                </executions>
            </plugin>
Also you need to install GnuPG and add the Maven GPG Plugin, which will sign your artifacts while the package phase:
            <plugin>
                <groupId>org.apache.maven.plugins</groupId>
                <artifactId>maven-gpg-plugin</artifactId>
                <version>3.0.1</version>
                <executions>
                    <execution>
                        <id>sign-artifacts</id>
                        <phase>package</phase>
                        <goals>
                            <goal>sign</goal>
                        </goals>
                    </execution>
                </executions>
                <configuration>
                    <keyname>${gpg.key.id}</keyname>
                    <useAgent>true</useAgent>
                    <gpgArguments>
                        <arg>--verbose</arg>
                    </gpgArguments>
                </configuration>
            </plugin>
In the code above, ${gpg.key.id} is a placeholder for the ID of the GPG key pair to be used for signing the plugin. You require to have the secret key attached to that key pair as the secret key is the one used for creating the signature. If you do not have a GPG key pair yet you need to generate one:
gpg --gen-keyAlso don’t forget to export your keys and store the created .asc files in a safe location:
gpg --armor --export > public-key.asc
gpg --armor --export-secret-keys > secret-key.asc
You also need to publish your generated public key on one of the key servers supported by Maven Central:
gpg --keyserver keyserver.ubuntu.com --send-keys YOUR-KEY-ID
In the above command YOUR-KEY-ID is the placeholder for the ID of your generated key pair.
            <plugin>
                <groupId>org.apache.maven.plugins</groupId>
                <artifactId>maven-gpg-plugin</artifactId>
                <version>3.0.1</version>
                <executions>
                    <execution>
                        <id>sign-artifacts</id>
                        <phase>package</phase>
                        <goals>
                            <goal>sign</goal>
                        </goals>
                    </execution>
                </executions>
                <configuration>
                    <keyname>${gpg.key.id}</keyname>
                    <useAgent>true</useAgent>
                    <gpgArguments>
                        <arg>--verbose</arg>
                    </gpgArguments>
                    <executable>C:\Program Files (x86)\gnupg\bin\gpg.exe</executable>
                </configuration>
            </plugin>
Provide your credentials to deploy plugin
When you run maven from within an integrated development environment you need to provide your credentials for the Sonatype repository from within the settings.xml file so that Maven can read them.
If the settings.xml file does not exist yet, you need to create it and add servers tag with your credentials as shown in the following example content:
<settings xsi:schemaLocation="http://maven.apache.org/SETTINGS/1.1.0 http://maven.apache.org/xsd/settings-1.1.0.xsd"
xmlns="http://maven.apache.org/SETTINGS/1.1.0" xmlns:xsi="http://www.w3.org/2001/XMLSchema-instance">
    <servers>
        <server>
            <id>central</id>
            <username>MAVEN_REPO_USER</username>
            <password>MAVEN_REPO_PASS</password>
        </server>
        <server>
            <id>ossrh</id>
            <username>MAVEN_REPO_USER</username>
            <password>MAVEN_REPO_PASS</password>
        </server>
    </servers>
</settings>
In the code above MAVEN_REPO_USER is the placeholder for your username at the Sonatype repository and MAVEN_REPO_PASS is the placeholder for your password for the Sonatype repository
Deploy your artifact
Now deploy your artifact to Maven Central:
mvn clean deployNow login into your Sonatype repository with your credentials from issues.sonatype.org and check if the artifact has been deployed. If you see your deployed artifact in the list, you need to close and release it manually:
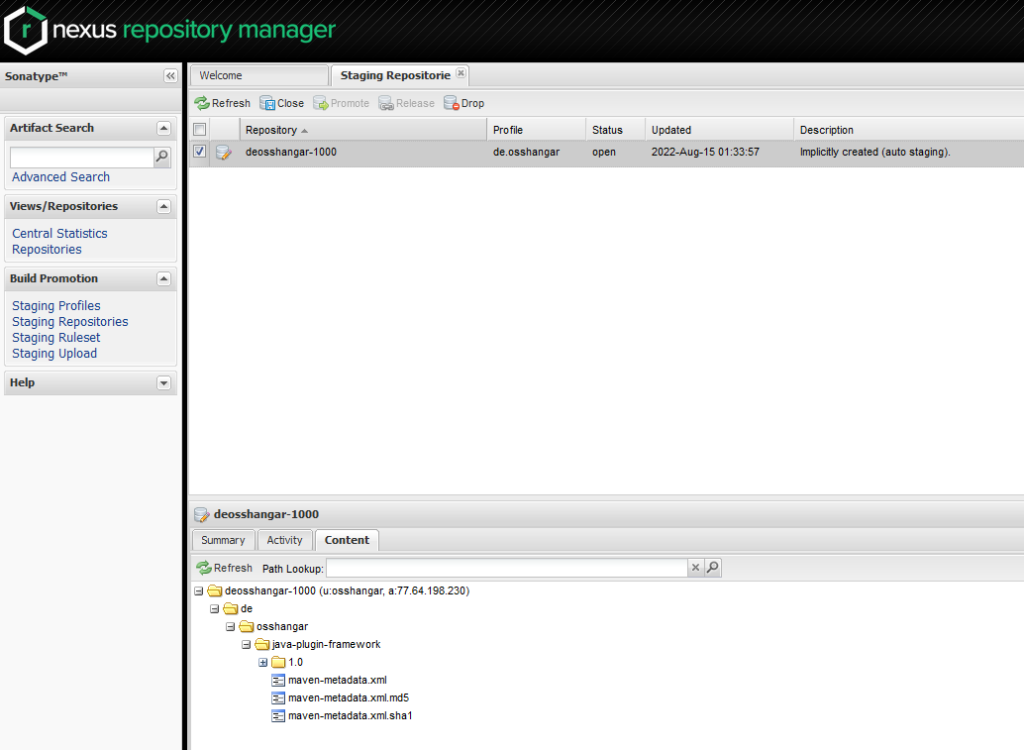
Click on the Close button to close the artifact. If it’s grayed out, then the artifact is already closed. When the close was successful your Activity tab should look like this:
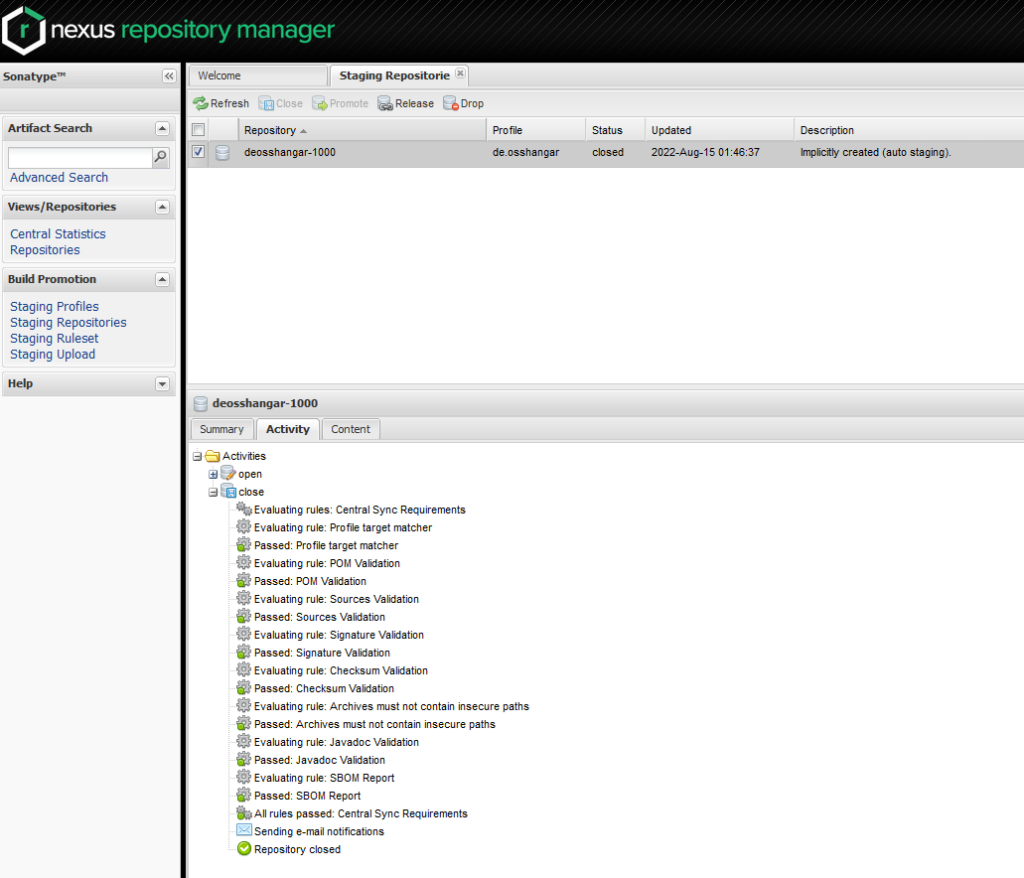
If there were errors while the close, they will be shown to you within the Activity tab and you will need to fix them before you can release your artifact.
Now click the Release button to release your artifact.
uploaded the artifact with the same version twice. To fix this, drop the old artifact version in the Sonatype repository by clicking the
button captioned „Drop“. Now increment the version number in your pom.xml and then run the command „mvn clean deploy“ again.